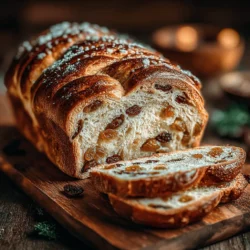
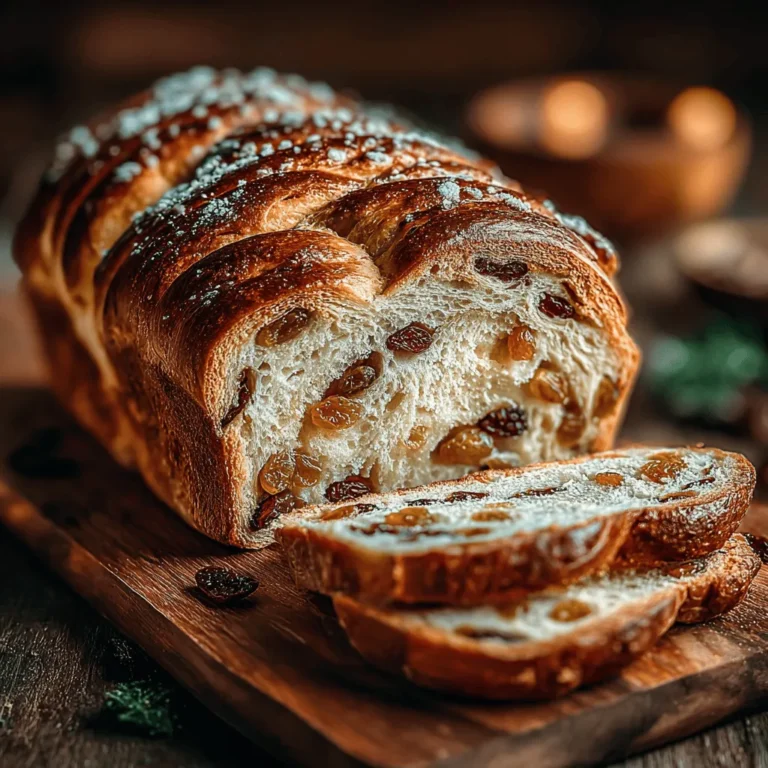
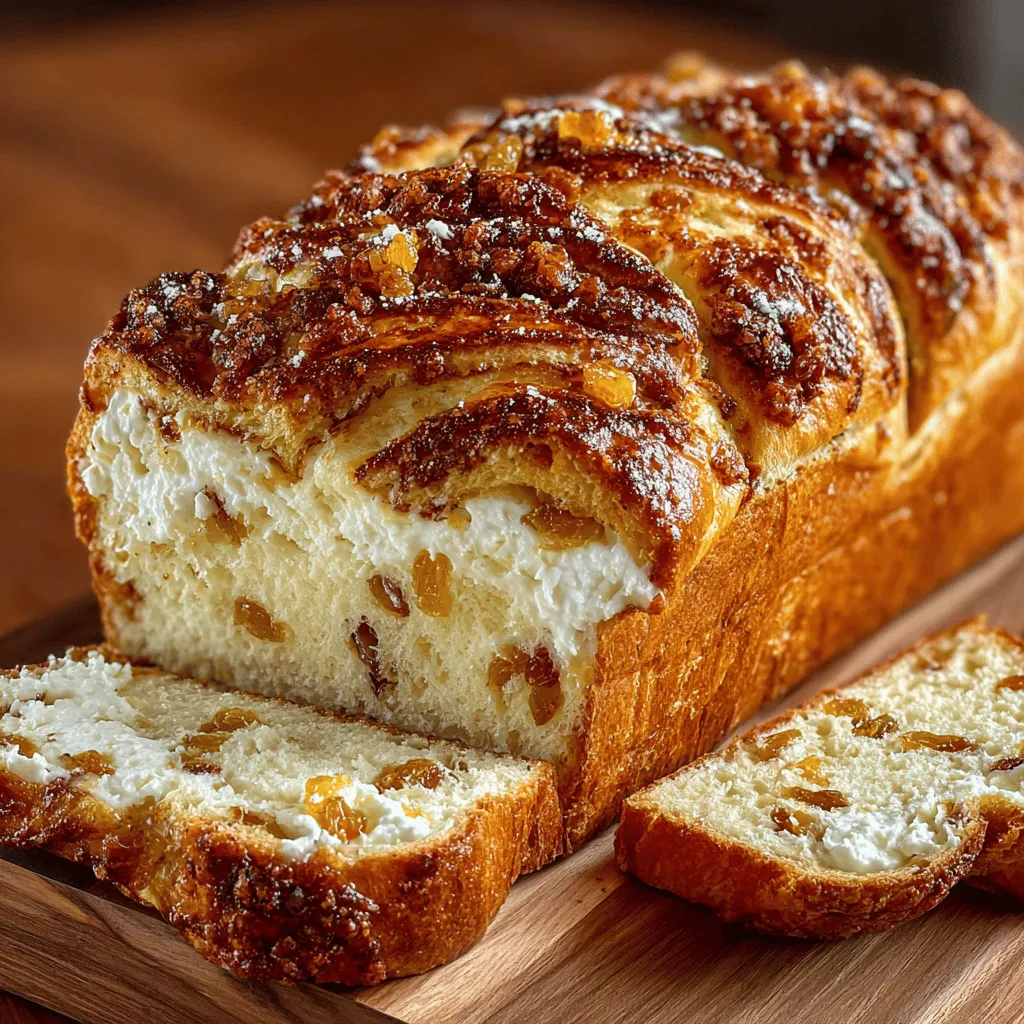
Cinnamon raisin swirl bread is more than just a delicious breakfast treat; it embodies comfort and nostalgia, evoking memories of warm kitchens filled with the inviting aroma of freshly baked bread. This sweet, spiced loaf is a favorite in many households and is often enjoyed toasted with butter or as the base for delightful French toast. The combination of cinnamon and raisins creates a harmonious blend of flavors that tantalizes the taste buds, making it a beloved choice for cozy mornings with family and friends.
The beauty of homemade bread lies not only in its taste but also in the experience of creating it. Baking your own cinnamon raisin swirl bread allows you to customize the sweetness and spice levels to suit your preferences, while also filling your home with an irresistible scent. In this article, we will guide you through each step of making this delightful bread, from understanding the key ingredients to preparing, shaping, and baking the dough. Whether you are an experienced baker or a novice in the kitchen, this recipe is accessible and rewarding.
Understanding the Ingredients
Before diving into the preparation process, it’s essential to understand the role of each ingredient in this cinnamon raisin swirl bread recipe. Each component contributes to the bread’s overall flavor, texture, and structure, ensuring that the final product is both delicious and satisfying.
– All-Purpose Flour: This versatile flour provides the necessary structure and texture for the bread. It contains a moderate amount of protein, which is essential for gluten development, resulting in a soft yet sturdy loaf.
– Active Dry Yeast: Serving as the leavening agent, active dry yeast is essential for making the bread rise. It ferments the sugars in the dough, producing carbon dioxide gas that creates air pockets, resulting in a light and fluffy texture.
– Warm Milk: The warmth of the milk activates the yeast, promoting fermentation and enhancing the rise of the dough. It also adds a subtle richness to the bread.
– Granulated Sugar: This ingredient not only sweetens the dough but also nourishes the yeast, allowing it to work effectively. A small amount of sugar helps to create a golden crust during baking.
– Salt: While it may seem counterintuitive, salt is crucial for enhancing flavor and balancing the sweetness. It also strengthens the dough, contributing to a better structure.
– Ground Cinnamon: The star of this recipe, ground cinnamon infuses the bread with its warm, aromatic flavor, making it an irresistible treat. Its fragrant notes are what make cinnamon raisin swirl bread so comforting.
– Unsalted Butter: Adding richness and moisture, butter contributes to the bread’s tender crumb. It also enhances the flavor, providing a depth that elevates the overall taste experience.
– Eggs: Eggs play a vital role in the structure and flavor of the bread. They help to bind the ingredients together and create a rich, tender loaf.
– Raisins: These dried fruits provide bursts of natural sweetness and chewy texture throughout the bread. They complement the cinnamon beautifully, adding an additional layer of flavor.
– Brown Sugar and Additional Cinnamon: Used for the filling, brown sugar offers a deeper, molasses-like sweetness, while additional cinnamon intensifies the warm spice notes in the swirl.
Step-by-Step Preparation Process
Activating the Yeast
The first step in creating your cinnamon raisin swirl bread is activating the yeast. This process is crucial because it ensures that the yeast is alive and capable of fermenting the dough effectively. To activate active dry yeast, you’ll want to combine it with warm milk (around 110°F or 43°C) and a bit of granulated sugar. The warmth of the milk stimulates the yeast, while the sugar serves as food for the yeast cells. Allow this mixture to sit for about 5-10 minutes until it becomes frothy and bubbly; this is a sign that your yeast is ready to use. If it doesn’t bubble, it may indicate that the yeast is expired or the milk was too hot, and you’ll need to start over.
Preparing the Dough
Once your yeast is activated, it’s time to prepare the dough. In a large mixing bowl, combine the all-purpose flour and salt, mixing them thoroughly to distribute the salt evenly. Next, make a well in the center of the flour mixture and pour in the activated yeast mixture, warm milk, and melted unsalted butter. Add the eggs at this stage as well. Using a wooden spoon or your hands, mix the ingredients until they start to come together. The goal here is to achieve a shaggy dough that is slightly sticky but holds together. If the dough feels too wet, gradually add more flour, a tablespoon at a time, until you reach the right consistency.
Kneading the Dough
With the dough coming together, it’s time to knead. Kneading is a critical step that develops the gluten in the flour, which gives the bread its structure and chewy texture. Transfer the dough to a lightly floured surface and begin kneading by pushing the dough away from you with the heels of your hands, then folding it back over itself. Rotate the dough a quarter turn and repeat the process. Continue kneading for about 8-10 minutes until the dough is smooth and elastic. It should spring back when gently poked. If the dough is sticking excessively, sprinkle a bit more flour as needed, but be cautious not to add too much, as this can lead to a dense loaf.
First Rise
After kneading, it’s time for the dough to rise. This step is essential for the bread’s final texture. Place the kneaded dough in a lightly greased bowl, turning it to coat all sides. Cover the bowl with a clean kitchen towel or plastic wrap to create a warm, humid environment, which is ideal for rising. Let the dough rise in a warm place for about 1 to 1.5 hours or until it has doubled in size. To create the perfect rising environment, consider placing the bowl in a slightly warmed oven (turn it off after preheating) or a sunny spot in your kitchen.
As you wait for the dough to rise, you can prepare the cinnamon-sugar filling by mixing brown sugar and ground cinnamon in a small bowl. This filling will add that signature swirl and flavor to your bread, making it truly irresistible.
Stay tuned for the next part, where we will guide you through shaping the dough, adding the filling, and baking your homemade cinnamon raisin swirl bread to perfection.
Crafting the Delicious Filling
Preparing the Filling
To create a delightful filling for your cinnamon raisin swirl bread, you’ll need to combine a few simple ingredients: cinnamon, brown sugar, and of course, raisins. Start by measuring out 1 cup of raisins and soaking them in warm water for about 10 minutes. This not only plumps them up for a softer bite but also enhances their flavor.
In a mixing bowl, combine 1/2 cup of packed brown sugar with 2 tablespoons of ground cinnamon. Feel free to adjust the amount of cinnamon to suit your taste, as some may prefer a stronger flavor. Once the mixture is uniform, drain the raisins and add them to the bowl, mixing everything together until the raisins are evenly coated. This balance of sweet brown sugar and aromatic cinnamon with the chewy texture of raisins creates a filling that’s irresistible and will permeate the entire bread.
Shaping the Bread
Now that your filling is ready, it’s time to shape the bread. Start by rolling out your risen dough on a lightly floured surface into a rectangle approximately 12×18 inches. The key here is to maintain an even thickness of about 1/4 inch. Use a rolling pin for this step, ensuring the dough doesn’t stick by dusting it with a little flour as needed.
Once your dough is rolled out, spread the prepared filling evenly over the surface using a spatula. Make sure to leave a small border around the edges (about 1/2 inch) to prevent the filling from spilling out when you roll the dough. This ensures that every bite of your bread will be infused with the delightful sweetness of cinnamon and raisins.
When the filling is spread evenly, it’s time to roll the dough tightly from one long side to the other, creating a log shape. As you roll, make sure to keep the tension consistent. This will help maintain the swirl design that is characteristic of cinnamon raisin bread. Once you reach the end, pinch the seam to seal it securely. For an added touch, you can even gently twist the ends of the log to secure the filling even further.
The Art of Shaping and Second Rise
Rolling and Shaping the Dough
After rolling your dough into a log, place it seam-side down on a lightly greased baking pan or in a loaf pan. It’s essential to ensure that the dough is shaped well, as this will affect the final texture and appearance of your bread. If desired, you can gently shape the ends of the dough to tuck them underneath, giving it a more polished look.
Once shaped, cover the dough with a clean kitchen towel or plastic wrap, and allow it to rise in a warm environment for about 30 to 45 minutes. This second rise is crucial as it allows the dough to expand and become light and airy. You’ll know it’s ready when it has puffed up noticeably, typically about 1 to 1.5 times its original size.
Second Rise
The second rise is not just about volume; it allows the gluten to relax, which results in a softer crumb. If you skip this step, the baked bread may end up dense and chewy, detracting from the lightness you’re aiming for. Patience is key here, so resist the urge to rush through this step.
Baking the Bread
Preheating and Baking
Preheat your oven to 350°F (175°C) while your dough is undergoing its second rise. Preheating is essential for achieving an evenly baked loaf. Once the oven reaches the desired temperature, place the bread in the center rack. It typically takes about 30 to 35 minutes for the bread to bake completely.
To check for doneness, you can use a few methods. One of the best ways is to tap the bottom of the loaf; if it sounds hollow, it’s likely done. Alternatively, you can use a kitchen thermometer; the internal temperature of the bread should read around 190°F (88°C) when fully baked.
Cooling the Bread
Once baked, remove the bread from the oven and allow it to cool in the pan for about 10 minutes. After this initial cooling period, transfer the bread to a wire rack to cool completely. This step is crucial as it prevents the bottom from becoming soggy, allowing for a perfect crust. Slicing the bread too soon can result in a gummy texture, so exercise a little patience here.
Serving Suggestions
Now that your cinnamon raisin swirl bread is beautifully baked and cooled, it’s time to enjoy it. There are numerous ways to savor this delicious treat. A simple yet delightful option is to toast slices and spread a generous layer of butter for a warm, comforting snack. For an extra indulgence, consider topping it with cream cheese or a flavored spread like honey or almond butter.
Pairing your bread with beverages can elevate the experience even further. A hot cup of coffee or tea complements the spices in the bread beautifully. For breakfast, serve it alongside a fresh fruit salad or yogurt for a balanced meal. You can also enjoy it as an afternoon snack or as a special treat during family gatherings.
Nutritional Information
One of the many benefits of homemade cinnamon raisin swirl bread is that you can control what goes into it. Unlike store-bought options, which often contain preservatives and artificial ingredients, your homemade bread is crafted with wholesome ingredients.
A typical slice (1 oz) of this cinnamon raisin swirl bread contains approximately 100 calories, along with 2 grams of protein, 1 gram of fat, and 20 grams of carbohydrates, including 2 grams of fiber. The raisins contribute natural sweetness and a good dose of iron and potassium, while the whole wheat flour adds additional fiber and nutrients.
Homemade bread allows you to enjoy a treat that feels indulgent while still providing nutritional benefits.
Conclusion
Baking cinnamon raisin swirl bread at home offers a unique blend of joy and satisfaction that is hard to replicate. The process of crafting the dough, preparing the filling, and watching your creation rise and bake is an experience filled with warmth and comfort. As your kitchen fills with the inviting aroma of cinnamon and freshly baked bread, you’ll find that the effort is truly worth it.
Don’t hesitate to experiment with variations of this recipe. Adding nuts like walnuts or pecans can introduce a delightful crunch, while spices like nutmeg or allspice can elevate the flavor profile even further. Sharing a loaf of homemade cinnamon raisin swirl bread with family and friends can foster connections, creating memories that last long after the last slice is gone.
Embrace the comfort and joy of baking—there’s nothing quite like the happiness that comes from sharing warm, homemade bread fresh from the oven.