
Crispy Chicken Tenders with Honey Mustard Dip: A Delicious Homemade Experience
Crispy chicken tenders have long been celebrated as a beloved comfort food, cherished by children and adults alike. Their golden, crunchy exterior paired with tender, juicy meat makes them an irresistible choice for any meal or snack. Whether served on a weeknight dinner table or at a casual gathering with friends, these chicken tenders offer a sense of familiarity and warmth that many people crave. Adding a homemade honey mustard dip elevates the dish, offering a sweet and tangy flavor that beautifully complements the savory crunch of the tenders. This recipe promises an approachable yet satisfying cooking experience that will leave your taste buds wanting more.
The Allure of Crispy Chicken Tenders
Chicken tenders are a universal favorite, appearing on menus across various cuisines. Commonly found at family gatherings, parties, and casual dining spots, they have become a staple for their versatility. Many people opt for store-bought options for convenience, but homemade chicken tenders can be both healthier and more flavorful. When prepared from scratch, you have complete control over the ingredients, allowing you to avoid artificial additives and excessive sodium often found in frozen varieties. Plus, the satisfaction of biting into a perfectly cooked, crispy chicken tender that you made yourself is unmatched.
Key Ingredients for Success
To achieve the ultimate crispy chicken tenders, the selection and preparation of each ingredient play a critical role. Here’s a closer look at what you’ll need:
– Chicken: Using boneless, skinless chicken breasts is crucial for this recipe. Not only do they cook quickly and evenly, but their tender texture makes for an enjoyable eating experience. When cut into uniform strips, they ensure consistent cooking times, preventing any pieces from being overdone or undercooked.
– Buttermilk: Marinating the chicken in buttermilk is a game-changer. This ingredient acts as a natural tenderizer, thanks to its acidity, which breaks down the proteins in the chicken. Additionally, buttermilk infuses the meat with moisture, ensuring that the tenders remain juicy even after frying.
– Spices: Flavor is key to any dish, and the combination of garlic powder, onion powder, paprika, salt, and pepper brings a depth of taste to the chicken. Garlic and onion powders provide a savory kick, while paprika adds a hint of smokiness and vibrant color to the coating. A touch of salt enhances all the flavors, and freshly cracked pepper adds a subtle heat that balances the dish.
– Breading Components: The crunchiness of the chicken tenders comes from a blend of flour, crushed cornflakes, and Parmesan cheese. The flour forms the base of the breading, creating a light coating that adheres well to the chicken. The crushed cornflakes offer an extra crunch, turning golden and crispy during frying. Meanwhile, the addition of Parmesan cheese not only enhances the flavor but also contributes to the overall crispiness of the breading.
Step-by-Step Preparation of Crispy Chicken Tenders
Now that you’re familiar with the key ingredients, let’s dive into the preparation process to create your crispy chicken tenders.
Prepping the Chicken
Start by cutting your boneless, skinless chicken breasts into uniform strips, about one inch wide. This step is essential not only for aesthetic reasons but also for ensuring that each tender cooks evenly. If the pieces are too thick or uneven, some might end up overcooked while others remain undercooked. Once cut, place the chicken strips in a bowl, ready for marination.
Marination Process
Next, prepare the marinade by combining buttermilk with the spices—garlic powder, onion powder, paprika, salt, and pepper. Whisk the mixture until well blended, then pour it over the chicken strips, ensuring each piece is fully coated. Cover the bowl with plastic wrap or transfer the chicken to a resealable bag, allowing it to marinate in the refrigerator for at least 1 hour, or ideally, overnight. This marination time is crucial as it allows the flavors to penetrate the chicken while also keeping it moist during cooking.
As the chicken marinates, the buttermilk will tenderize the meat and infuse it with flavor, setting the stage for deliciously crispy tenders. The anticipation will build as you await the next steps in this delightful cooking journey.
Stay tuned for the subsequent steps that will guide you through the breading and frying process, where the magic truly happens, transforming your marinated chicken into golden, crispy tenders that perfectly pair with the honey mustard dip.
Breading Setup
Achieving the perfect crispy coating on chicken tenders is a three-step breading process that will elevate your dish and impress your guests. The three stages involve dredging the chicken in seasoned flour, dipping it into a rich egg wash, and finally coating it with breadcrumbs.
Step 1: Prepare Your Breading Station
Begin by setting up your breading station with three shallow dishes. In the first dish, mix all-purpose flour with a pinch of salt, black pepper, and any additional spices you desire, such as paprika or garlic powder, for an extra kick. This seasoned flour will create a flavorful base for the tenders.
In the second dish, whisk together two large eggs with a splash of milk until well combined. This egg wash will help the breadcrumbs adhere to the chicken, ensuring a thick, crunchy coating.
In the third dish, pour in your choice of breadcrumbs. Panko breadcrumbs are highly recommended for their ability to create a light and airy texture, but traditional breadcrumbs will work just as well. For an added touch, consider seasoning the breadcrumbs with herbs like oregano or thyme.
Step 2: Breading the Chicken
Take your chicken tenderloins and one by one, coat them in the seasoned flour. Ensure that each piece is evenly covered, shaking off any excess flour. Next, dip the floured chicken into the egg wash, allowing any surplus to drip off. Finally, transfer the chicken to the breadcrumb dish, pressing firmly to ensure a thorough coating. Repeat this process for all chicken pieces, placing them on a parchment-lined baking sheet once coated. This method guarantees that each tender is evenly breaded, leading to an exceptional crunch when cooked.
Tips for a Perfect Coating
– Drying the Chicken: Pat the chicken tenders dry before breading to help the coating stick better.
– Resting Time: After breading, let the chicken sit for about 10 minutes. This allows the coating to adhere more firmly, reducing the chances of it falling off during frying.
– Double Breading: For an even crunchier texture, consider double-breading your chicken. Simply repeat the steps for egg and breadcrumbs after the first coating.
Frying Technique
Frying the chicken tenders correctly is critical for achieving that sought-after golden brown color and crispy texture. Follow these detailed steps to ensure perfect results.
Oil Temperature
Start by heating a large, deep skillet or Dutch oven over medium-high heat and pour in enough vegetable oil (or another frying oil with a high smoke point) to reach about 1 to 2 inches deep. Use a kitchen thermometer to monitor the oil temperature, aiming for around 350°F (175°C). This temperature ensures that the chicken cooks evenly, preventing it from absorbing too much oil and becoming greasy.
Cooking Time
Once the oil reaches the desired temperature, carefully add the breaded chicken tenders in batches, ensuring not to overcrowd the pan. This allows the oil to maintain its temperature, leading to an evenly cooked tender. Fry the chicken for about 3 to 4 minutes on each side, or until they are golden brown and the internal temperature reaches 165°F (74°C). Use tongs to flip the chicken halfway through cooking, ensuring an even browning.
Draining the Chicken
Once cooked, remove the chicken tenders from the oil and place them on a paper towel-lined plate to drain any excess oil. This step is essential for maintaining that crispy exterior. For the best results, serve the chicken tenders immediately while they are hot and crispy.
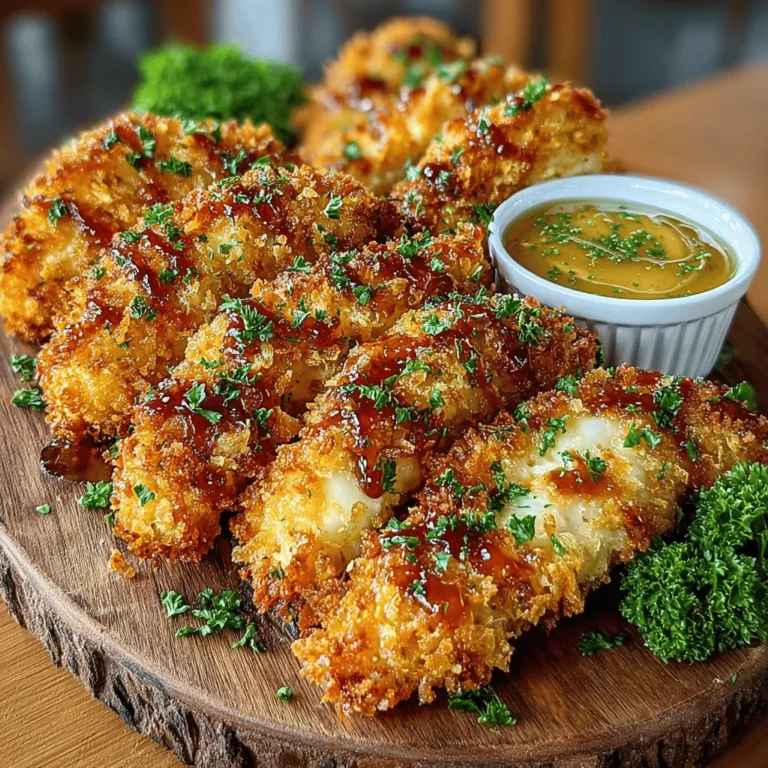
Crafting the Perfect Honey Mustard Dip
No chicken tender dish is complete without a delicious dipping sauce. The honey mustard dip is simple to make and perfectly complements the savory flavors of the tenders.
Ingredients for the Honey Mustard Dip
To make this delightful dip, gather the following ingredients:
– 1/2 cup Dijon mustard
– 1/4 cup honey
– 1 tablespoon apple cider vinegar (optional for added tang)
– Salt and pepper to taste
Steps to Prepare the Dip
1. In a small bowl, combine the Dijon mustard and honey. Mix well until fully blended.
2. If you prefer a tangier flavor, stir in the apple cider vinegar. This addition balances the sweetness of the honey with a slight acidity.
3. Season with salt and pepper according to your taste preferences. Adjust the sweetness or tanginess by adding more honey or mustard as desired.
4. Serve the dip in a small bowl alongside your crispy chicken tenders.
Flavor Variations
Feel free to customize your honey mustard dip based on your taste. You can experiment with different types of mustard, such as whole grain or spicy brown, for varied flavors. Adding a pinch of cayenne pepper or smoked paprika can provide an exciting kick, while fresh herbs like dill or chives can introduce a refreshing note.
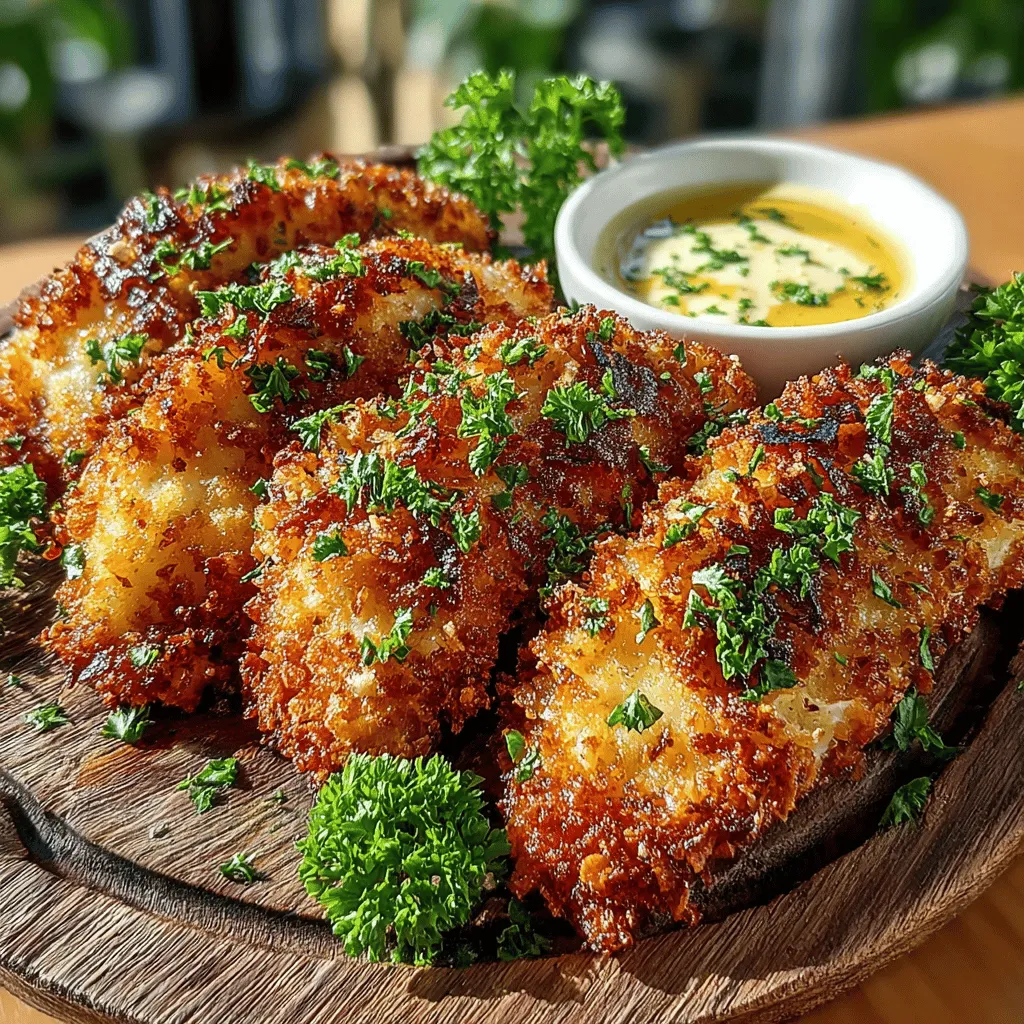
Serving Suggestions and Pairings
Presenting your crispy chicken tenders and honey mustard dip creatively enhances the dining experience. Here are some serving suggestions:
Platter Arrangement Ideas
– Family Style: Arrange the chicken tenders on a large platter, surrounded by small bowls of the honey mustard dip. This setup encourages sharing and adds a casual, inviting atmosphere to your meal.
– Individual Plates: For a more formal presentation, serve each chicken tender on individual plates with a small bowl of dip. Garnish with fresh parsley or microgreens for a pop of color.
Complementary Side Dishes
To round out your meal, consider pairing the chicken tenders with these delicious side dishes:
1. Crispy French Fries: A classic pairing, golden fries complement the tenders perfectly.
2. Fresh Salad: A light green salad with a citrus vinaigrette balances the richness of the chicken, adding freshness to the plate.
3. Roasted Vegetables: Seasonal roasted vegetables, such as carrots, zucchini, and bell peppers, provide a nutritious and colorful addition to your meal.
4. Macaroni and Cheese: For a comforting twist, serve your tenders alongside creamy macaroni and cheese.
Nutritional Information and Benefits
Crispy chicken tenders can be a healthy meal option when made at home, allowing you to control the ingredients and avoid preservatives often found in fast food.
Protein Power
Chicken is an excellent source of lean protein, which is essential for muscle repair and growth. A serving of chicken tenders provides a substantial protein boost, making it a satisfying option for those maintaining an active lifestyle.
Homemade vs. Fast Food
Opting for homemade chicken tenders allows you to avoid the unhealthy additives present in many fast-food offerings. You can control the amount of oil used during frying and select high-quality chicken, ensuring a healthier meal without sacrificing flavor.
Dietary Considerations
If you or your guests require a gluten-free option, you can easily modify this recipe. Substitute the all-purpose flour with a gluten-free flour blend, and choose certified gluten-free breadcrumbs. This way, everyone can enjoy the crispy delights without worry.
Conclusion
Creating your own crispy chicken tenders with homemade honey mustard dip is not just an easy task; it is also a rewarding culinary experience that brings joy to the kitchen. The three-step breading process guarantees a crunchy exterior, while the frying technique ensures perfectly cooked tenders that are golden brown on the outside and juicy on the inside.
Whether serving this dish for a casual family dinner or a special gathering with friends, the combination of crispy chicken and tangy honey mustard dip is sure to delight. With the ability to customize both the chicken and the dip, you can cater to your family’s taste preferences and dietary needs.
So roll up your sleeves, gather your ingredients, and enjoy the process of creating these delicious chicken tenders. The satisfaction of serving a homemade meal that rivals your favorite restaurant is a reward in itself. Happy cooking!
