
Elegant Pear & Almond Danish Braids: A Gourmet Delight
Danish pastries have long captivated the hearts and palates of bakers and food enthusiasts worldwide. Known for their flaky, buttery layers, these treats have become synonymous with indulgence and craftsmanship. The artistry of creating Danish pastries reflects the rich traditions of European baking, particularly in Denmark, where the concept originated. Among the myriad flavors and fillings, the combination of pears and almonds stands out as a unique pairing that marries sweetness with a nutty depth. This recipe for Elegant Pear & Almond Danish Braids elevates this classic pastry into a stunning centerpiece, perfect for special occasions, brunches, or simply as a luxurious treat to savor.
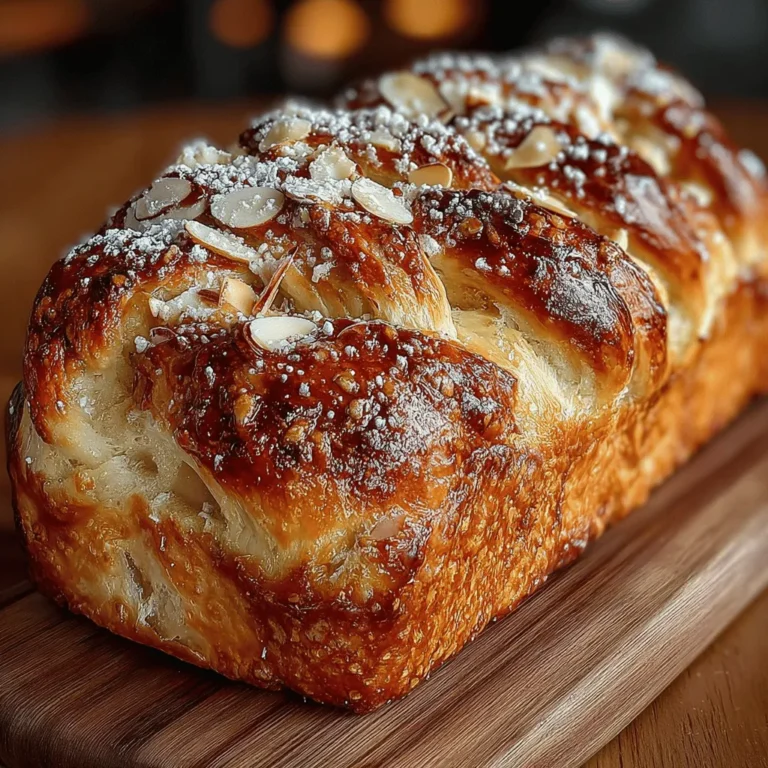
What makes this Danish braid truly special is not just its exquisite flavor profile but its elegant presentation. The interplay of the juicy, sweet pears with the rich, aromatic almond paste creates a filling that is both satisfying and sophisticated. When wrapped in a delicate, flaky dough and braided into an eye-catching shape, these Danish pastries become a feast for the eyes as well as the taste buds. Whether you’re hosting a gathering or treating yourself to a delightful breakfast, this recipe is sure to impress.
Understanding Danish Pastry
To appreciate the elegance of our Pear & Almond Danish Braids, it’s essential to understand what constitutes Danish pastry and its storied origins. This beloved pastry is a type of laminated dough, similar to croissant dough, that involves layering butter within the dough to create thin, flaky layers. The origins of Danish pastry can be traced back to the 19th century in Denmark, where bakers adopted the technique from Austrian bakers who had migrated to the region. The result was a uniquely Danish creation that has since become a staple in bakeries around the world.
A well-crafted Danish pastry is characterized by its flaky texture, which is achieved through careful lamination, and its versatility in terms of fillings and shapes. From fruit and nut combinations to custards and chocolates, the possibilities are endless. In Scandinavia, Danish pastries hold cultural significance, often enjoyed during holidays and celebrations. The tradition of serving these pastries continues to thrive, making them a beloved choice for gatherings and festive occasions.
Ingredients Breakdown
Creating the perfect Elegant Pear & Almond Danish Braids requires a thoughtful selection of ingredients, each playing a vital role in achieving the desired texture and flavor.
Dough Ingredients
1. Flour: All-purpose flour is the foundation of the dough, providing the necessary structure and strength. It allows for the formation of gluten, which contributes to the pastry’s flaky texture.
2. Butter: Unsalted butter is key to achieving the rich, buttery flavor and flaky layers characteristic of a good Danish pastry. The butter must be cold to ensure proper lamination.
3. Sugar: Granulated sugar adds a touch of sweetness to the dough and helps with browning during baking.
4. Salt: A small amount of salt enhances the overall flavor by balancing the sweetness of the dough.
5. Yeast: Active dry yeast is essential for leavening the dough, allowing it to rise and develop a light, airy texture.
6. Milk: Milk adds moisture and richness to the dough, contributing to its tender crumb.
7. Vanilla: Pure vanilla extract infuses the dough with a warm, aromatic flavor that complements the filling.
8. Eggs: Eggs add richness to the dough and help bind the ingredients, contributing to its elasticity and texture.
Each of these ingredients plays a crucial role in the overall success of the pastry, ensuring it has the right balance of flavor and texture.
Filling Ingredients
The filling for our Pear & Almond Danish Braids is where the magic truly happens. The combination of fresh pears and almond flavors creates a deliciously rich and aromatic filling.
1. Pears: Fresh, ripe pears provide natural sweetness and moisture. They add a delightful juiciness that balances the richness of the almond paste.
2. Almond Paste: This sweetened mixture of ground almonds and sugar is the star of the filling, providing a rich, nutty flavor that pairs beautifully with the pears.
3. Ground Almonds: Adding ground almonds enhances the almond flavor and contributes to the filling’s texture.
4. Brown Sugar: Using brown sugar instead of white sugar adds a hint of molasses flavor, deepening the overall taste.
5. Cinnamon: A sprinkle of cinnamon adds warmth and spice, complementing the sweetness of the pears and the nutty notes of the almonds.
6. Lemon Zest: Fresh lemon zest brightens the filling, providing a refreshing contrast to the richness of the other ingredients.
Additionally, pears and almonds are both known for their health benefits. Pears are a great source of dietary fiber, which aids digestion, while almonds are packed with healthy fats, protein, and essential nutrients.
Assembly Ingredients
To finish our Elegant Pear & Almond Danish Braids, we’ll need a couple of finishing touches that enhance both appearance and flavor:
1. Sliced Almonds: Sprinkling sliced almonds on top of the braided pastries before baking adds a delightful crunch and enhances the almond flavor.
2. Powdered Sugar: A dusting of powdered sugar after baking provides a sweet finishing touch, elevating the pastry’s presentation and making it even more enticing.
Step-by-Step Guide to Making Pear & Almond Danish Braids
Preparing the Dough
The first step in creating your Elegant Pear & Almond Danish Braids is to prepare the dough. Start by combining the flour, sugar, and salt in a large mixing bowl. In a separate bowl, activate the yeast by dissolving it in warm milk and letting it sit until frothy. This step is crucial, as it ensures that your dough will rise properly.
Once the yeast is ready, add it to the flour mixture along with melted butter, eggs, and vanilla extract. Mix until a rough dough forms. At this stage, it’s important to knead the dough until it reaches the right consistency—smooth and elastic, yet slightly tacky to the touch. This process typically takes about 8-10 minutes by hand or 5-7 minutes with a stand mixer fitted with a dough hook.
After kneading, shape the dough into a ball and place it in a greased bowl, covering it with a clean kitchen towel. Allow it to rise in a warm, draft-free area until it doubles in size, which usually takes about an hour.
As the dough rises, you can prepare the filling and the assembly ingredients, setting the stage for the next steps in this delightful baking journey.

Creating a delightful Pear & Almond Danish is not just about the end product; it’s also about the process that leads to the flaky, buttery, and delicious pastry. This section will guide you through the essential steps of rising, filling, rolling, assembling, and baking your Danish, as well as tips for serving and nutritional information.
The Rising Process
Rising is a crucial step in making Danish pastries, impacting their texture and flavor. During this process, yeast ferments the sugars in the dough, producing carbon dioxide and causing the dough to expand. This results in a light and airy pastry that flakes beautifully when baked. For optimal results, allow the dough to rise in a warm, draft-free area until it doubles in size, usually about 1 to 2 hours.
A well-risen dough will have a soft but slightly elastic feel. If your kitchen is cool, you can create a warm environment by preheating your oven to the lowest setting for a few minutes, then turning it off and placing the covered bowl of dough inside.
Creating the Filling
Selecting the Best Pears
Choosing the right pears is essential for achieving a delicious filling. The best options for this recipe are Bosc or Anjou pears, known for their firm texture and sweet flavor. They hold up well during baking, ensuring a juicy center without becoming mushy.
Almond Paste vs. Homemade Almond Filling
While almond paste is convenient and provides a rich flavor, making your own almond filling can elevate your Danish to new heights. Homemade almond filling typically combines ground almonds, sugar, butter, and a hint of almond extract. This allows you to control the sweetness and flavor intensity, resulting in a more personalized touch. If you opt for almond paste, ensure it’s high quality to maintain the integrity of your pastry.
Rolling Out the Dough
Achieving the perfect rectangle when rolling out the dough is vital for even braiding. Lightly flour your work surface and use a rolling pin to flatten the dough to approximately 12×18 inches. The dough should be about 1/8 inch thick, allowing it to rise and puff up beautifully in the oven.
The Significance of Diagonal Cuts
Once you have your rectangle, it’s time to make the diagonal cuts that will form the braids. Cut strips about 1 inch wide along both long sides of the rectangle, ensuring the cuts are angled toward the center. This technique is essential as it allows for a beautiful braiding effect when you fold the strips over the filling, creating an elegant design.
Assembling the Danish
Braiding Technique
Assembling the Danish is where your creativity shines. Start by placing your pear and almond filling down the center of the rectangle. Then, take the outer strips of dough and fold them over the filling, alternating sides to create a braid.
For visual appeal, tuck the end pieces under the braid and pinch to seal. This not only secures the filling but also enhances the overall presentation. The key is to keep the braid tight but not too tight, allowing for some expansion during the final rise and baking.
Second Rise and Baking
The second rise is just as important as the first. It allows the assembled Danish to puff up further, ensuring a light and flaky texture. This rise should take about 30 to 45 minutes. During this time, preheat your oven to a temperature of 375°F (190°C).
Signs of Proper Baking
Bake the Danish for 25 to 30 minutes, or until it turns a beautiful golden brown. The filling should be bubbling slightly, and the dough should feel firm to the touch. If you notice any excessive browning, cover it loosely with aluminum foil to prevent burning while the inside continues to cook.
Serving Suggestions
The Pear & Almond Danish Braids are versatile and can be paired beautifully with various beverages. Consider serving them with a hot cup of coffee or tea for breakfast or as a delightful afternoon snack. For a more indulgent experience, a light dessert wine can complement the flavors perfectly.
Variations on the Recipe
Feel free to experiment with the filling. Adding spices like cinnamon or nutmeg can lend warmth to the flavor profile, while swapping pears for apples or even peaches can create a unique twist. You could also try combining different nuts or using a mix of fruits for added texture and taste.
Presentation Ideas
Presentation is key when serving pastries. Arrange the Danish on a decorative plate and consider garnishing with fresh fruit or a sprinkle of powdered sugar for an elegant touch. A side of whipped cream or crème fraîche can also add a luxurious element to your dessert.
Nutritional Information
Each serving of the Pear & Almond Danish offers a delightful balance of flavors and textures. While indulgent, it’s essential to consider the nutritional content. On average, a single serving contains approximately 250-300 calories, with 15-20 grams of sugar and 12-15 grams of fat.
Despite the richness, the inclusion of pears and almonds contributes beneficial nutrients, such as fiber and healthy fats. This balance allows you to indulge without guilt, as the fruits and nuts provide added health benefits.
Conclusion
The Pear & Almond Danish Braids are a true testament to the elegance and deliciousness that homemade pastries can offer. The combination of flaky dough, sweet pears, and rich almond filling creates a delightful experience that is sure to impress your guests and satisfy your taste buds.
Whether you are a novice baker or an experienced chef, this recipe offers an opportunity to hone your skills while creating a stunning pastry. The satisfaction of pulling a perfectly baked Danish out of the oven is unparalleled, and the joy of sharing it with loved ones is even greater.
So, roll up your sleeves and give this recipe a try. You might just find yourself creating a new favorite pastry that you’ll want to make again and again!
